DMD Remote1 Guide
If you bought the DMD Remote1 this page is for you.
We will keep this page updated as much as possible to provide all the information you need to assemble, operate and maintain your device.
If you want to contact us regarding adding support for more apps or about improving the functionality on a specific app use the forms in the bottom.
Installing
The remote installation is very simple but please check our instructions and recommendations first!
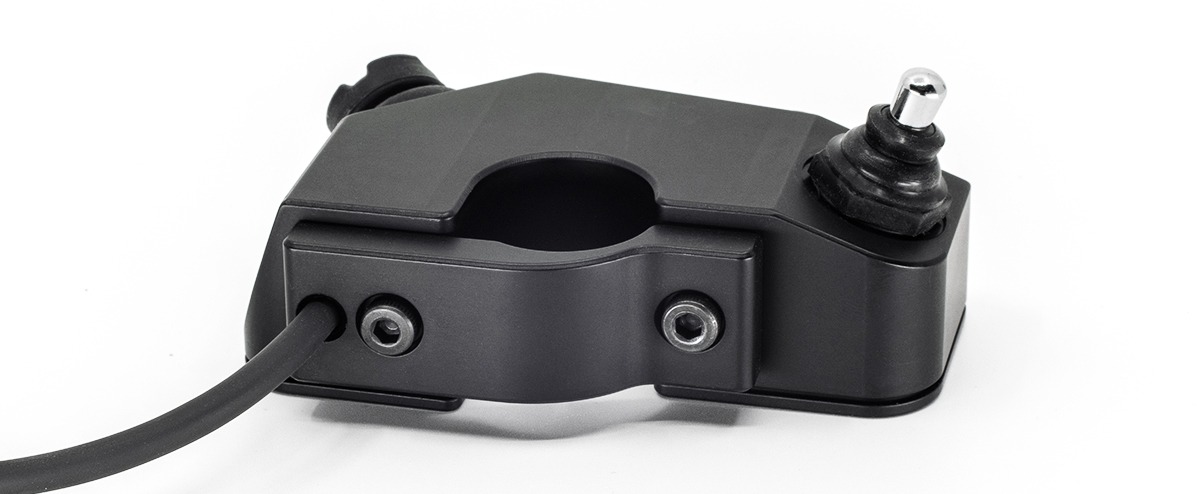
Always fully tight the top screw first!
- Remove the two screws that hold the controller bracket
- Get some room in your handlebar for where you are going to attach the remote
- Tighten the bracket by starting with the top screw, make sure you fully tighten the top screw first
- Secure the cable in a way where it wont get cut or damaged by the handlebar movement
Notes:
Required Key for screws: M4 Allen
Wiring (For version without connector)
Wiring includes both power and data connection since the device supports both bluetooth and wired communication.
Notice: All our DMD controllers now include a connector that connect to our devices harness and that is the only connector you need to plug for both power and data!
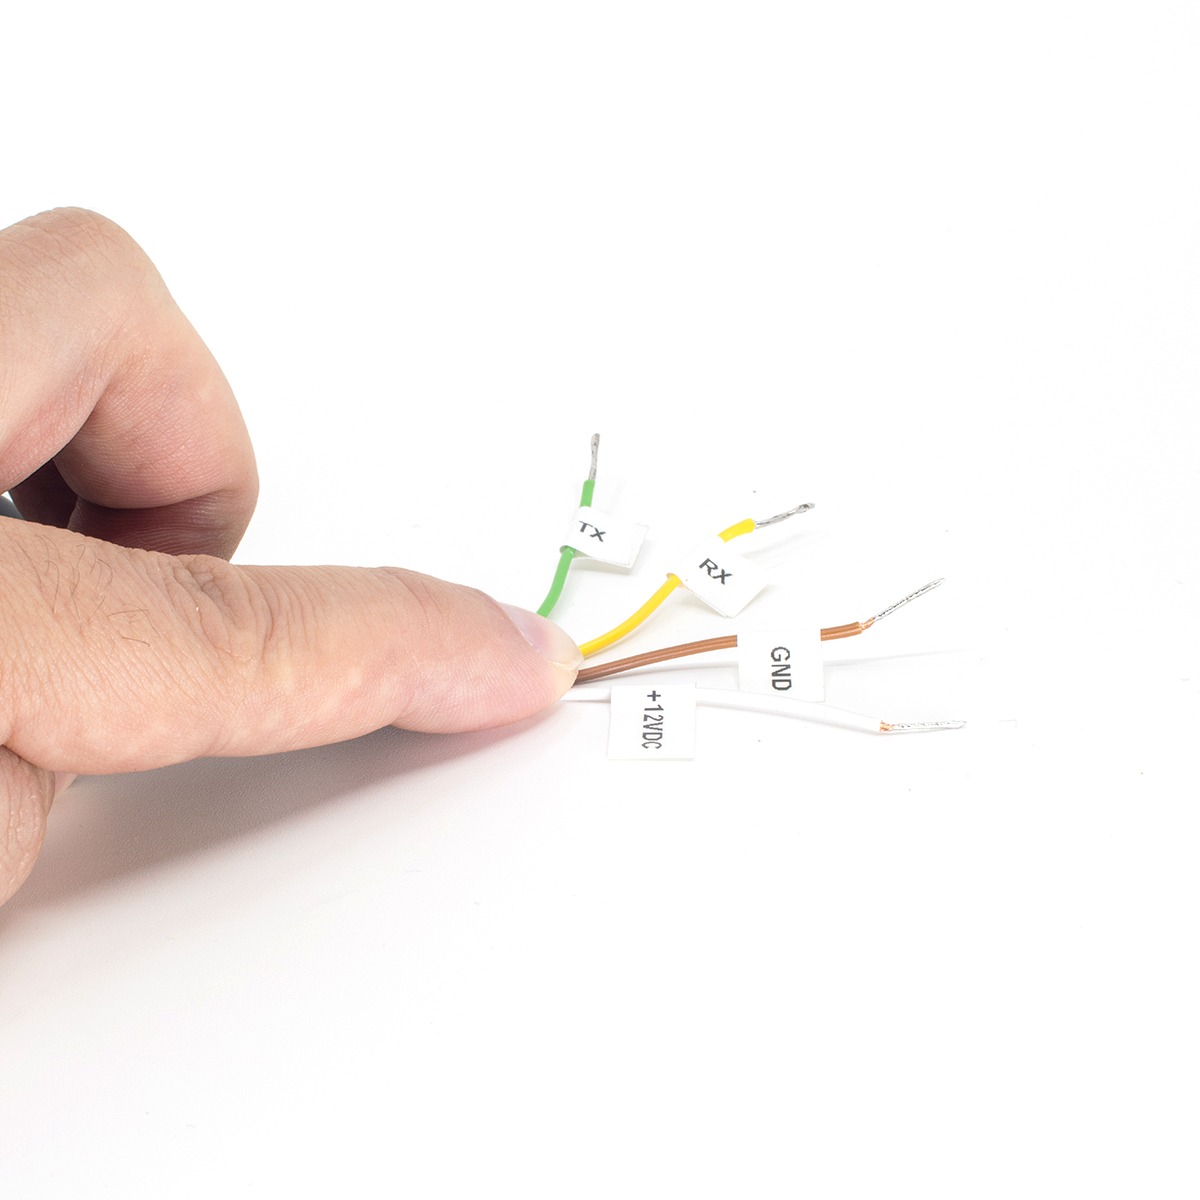
TX and RX are for optional wired communication with DMD-T865 / DMD-T665 devices
GND and +12V are for connecting to motorcycle 12V
There are 4 wires, two for power and two for data.
It is recommended to connect power post ignition so that the controller gets shutdown when you turn the ignition off.
Please notice this controller does not have any Idle / sleep mode, for that reason, if you connect it directly to battery you will need to implement a switch!
For power:
– White Cable – 12V
– Brown Cable – Ground
For communication (optional wired):
– Green Cable – TX
– Yellow Cable – RX
Notes:
Make sure you do not connect any of the RX / TX cables to 12V since this will damage the circuit!!!
Wired Communication:
Wired communication is available only with DMD-T865 and DMD-T665 devices which include TX / RX connection with RS232 standard.
TX / RX are always inverted between devices, example connections:
Controller TX ---> Connects to DMD-T865 RX
Controller RX <--- Connects to DMD-T865 TX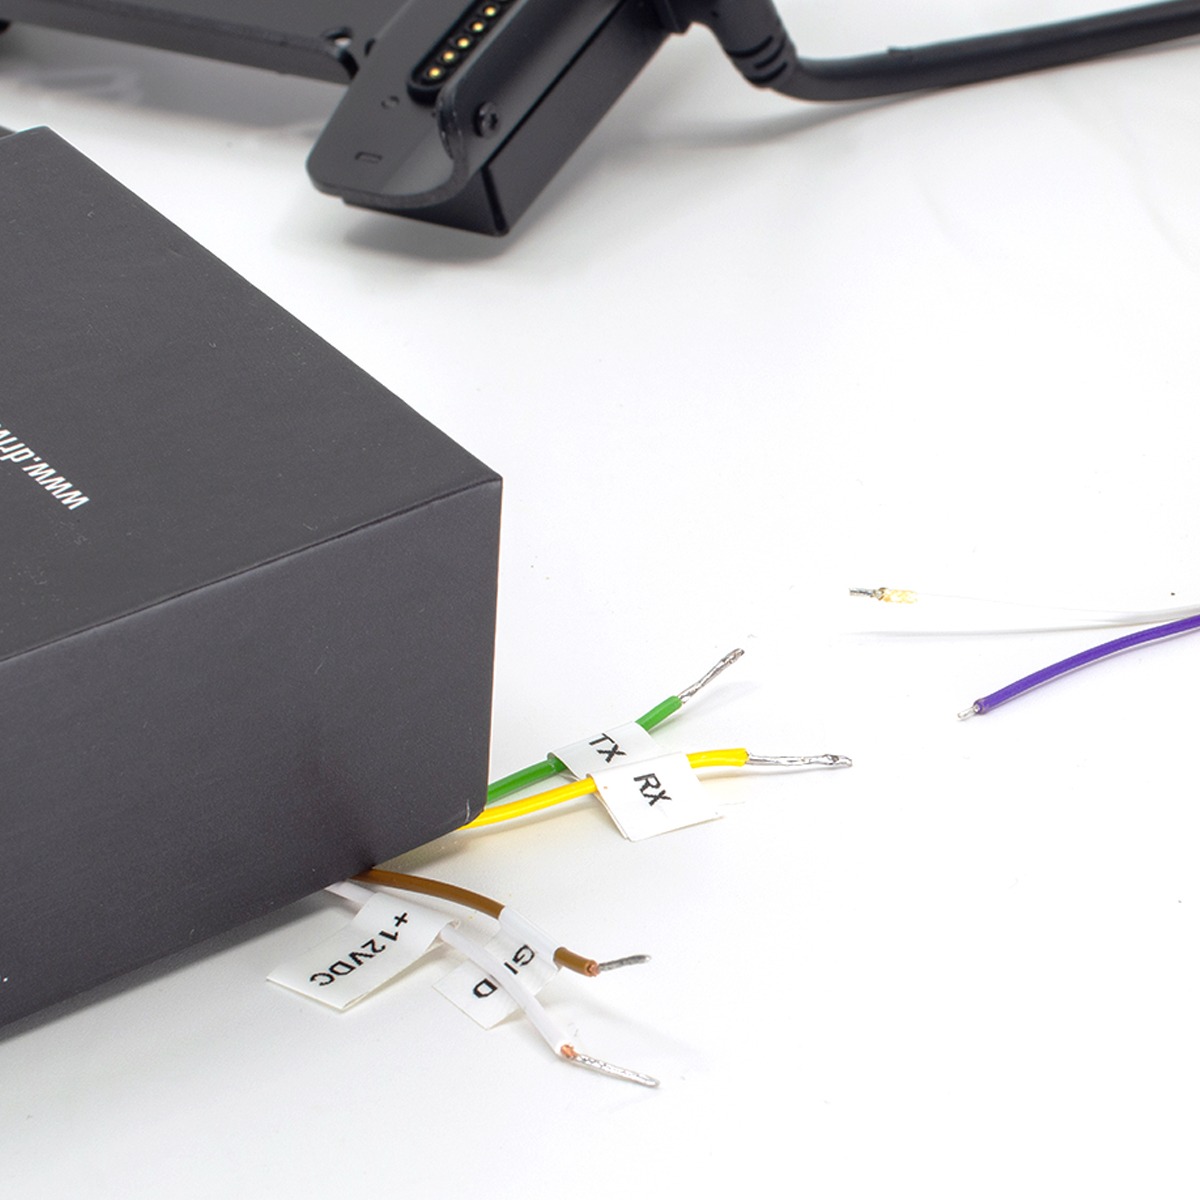
DMD-T865 RX Cable
DMD-T865 TX Cable
Remote RX Cable
Remote TX Cable
For DMD Devices
Connect the connector, done!
If you are using a DMD device and the controller connected by cable there is no extra wiring required, the cable connection will deliver communication and power.
No Bluetooth required when using cable connector.
Power is delivered to the controller through the cable connection.
DMD devices will already have the software installed as part of the OS.
Basically, plug the connector, that is it! Nothing else required.
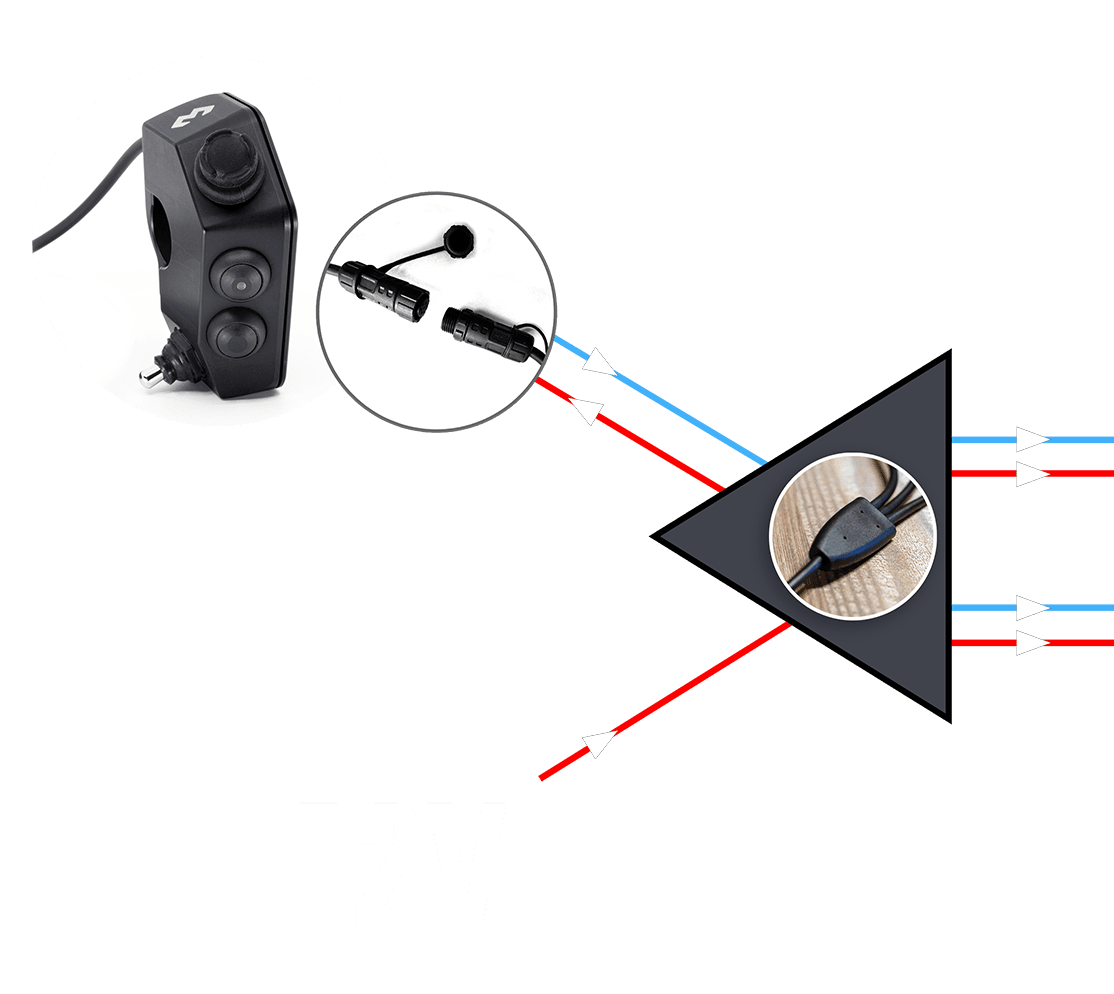
Connect the connector to the matching connector in the DMD device harness for data and power.
The DMD device harness will provide power to the controller.
Controller data is sent by wire (no Bluetooth required)
Bluetooth Mode (For Non-DMD devices)
First – BT Pairing: Power the controller and pair it with device
BT Pairing Example Video
Second – Controller App: Install remote controller app manually or just let DMD2 do it for you
To install the controller app, simply start DMD2 after pairing the remote it for install prompt or manually install apk
Buttons App
The Buttons app is included on all DMD devices system.
When the app first runs it will ask you two very important and required permissions. The first request is for you to enable the app accessibility service (which monitors for apps on the screen and does the wired comms) and the second is for Bluetooth connect permission. Depending on your device the way to do this can be a bit different, check the videos bellow.
Enabling Accessibility Service and permissions for the DMD-T865 (Android 12)
Enabling Accessibility Service and permissions for the Samsung S22 Ultra (Android 14)
App Functionality
The controller app is very simple and you do not need to open it for the controller to work.
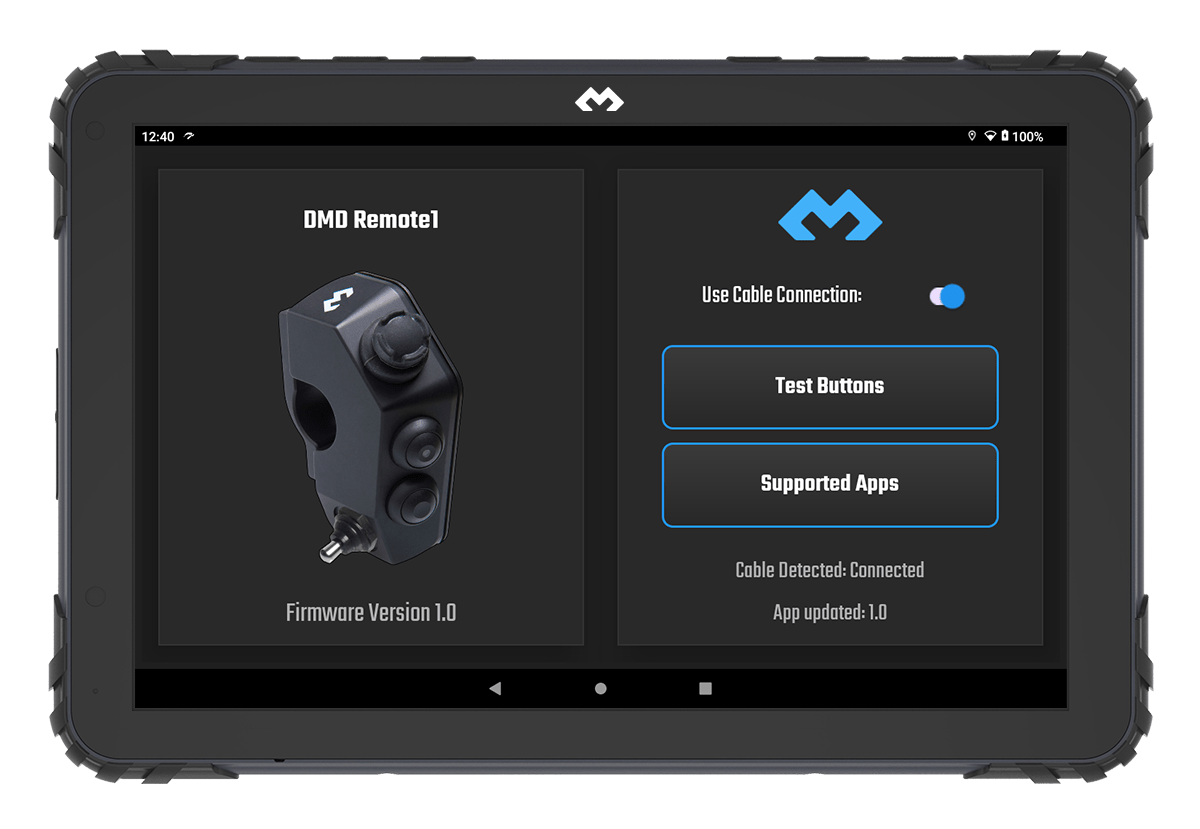
Firmware Version
Prefer cable connection (when available)
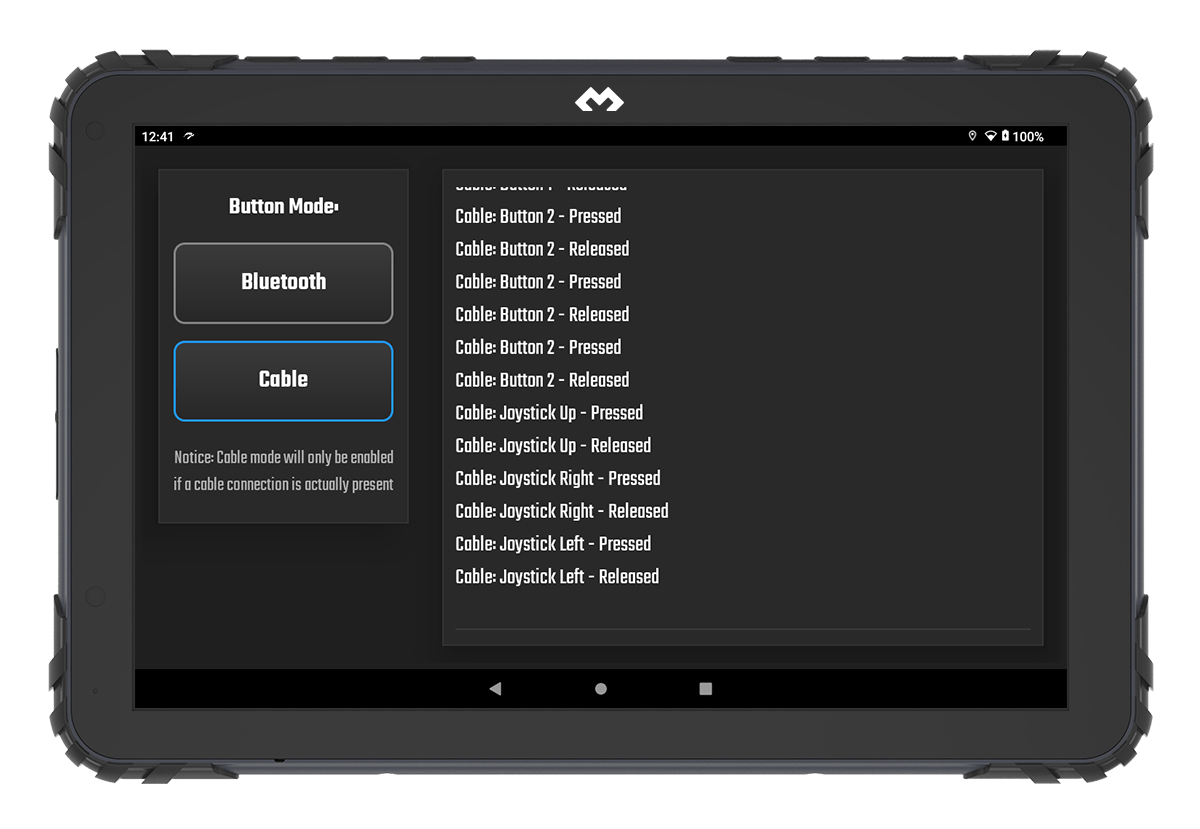
Test buttons (BT or Wired modes)
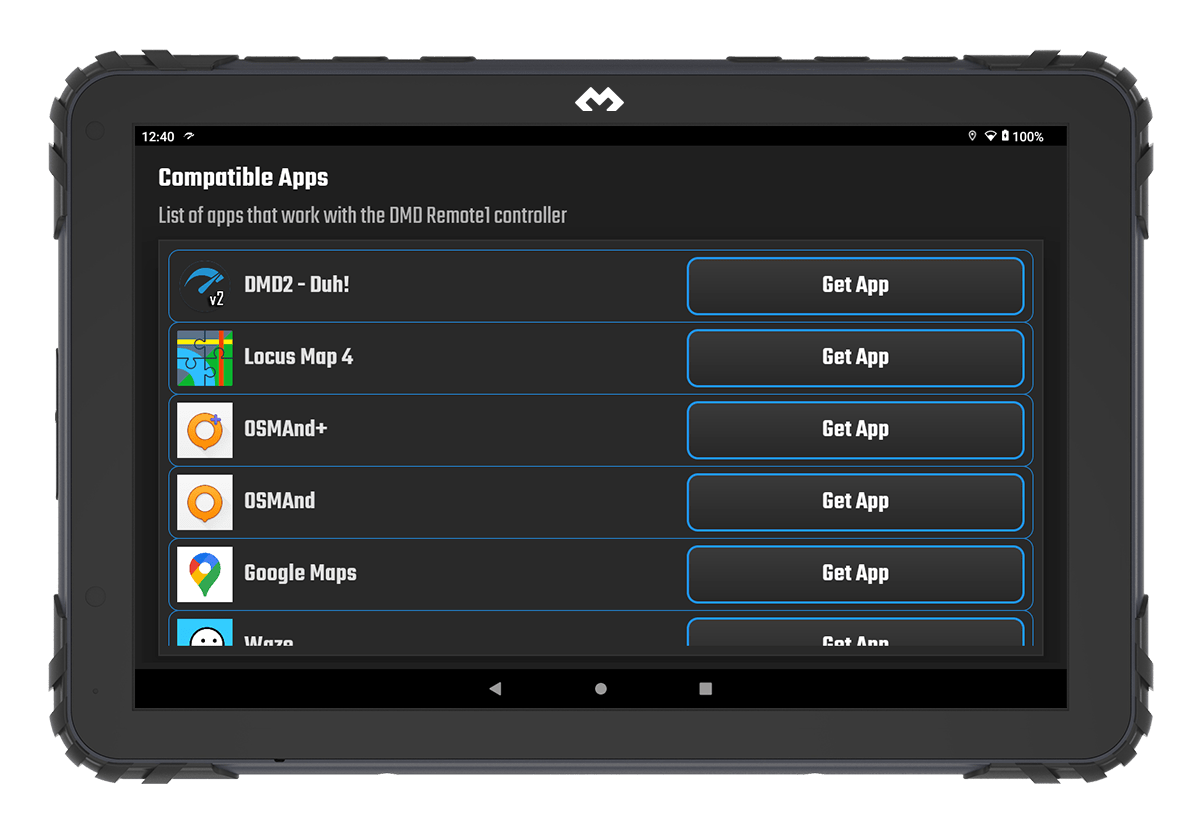
Check all the supported apps
Shows if a valid cable connection is available
Check for app updates
App Updates:
When there is any remote controller app update both DMD2 and the remote app will ask you to update, the process is done automatically with a single click. Updates can include FW updates and improvements for app control support or even new app profiles (to allow the remote to control new apps).
Functionality:
The user functions are very simple, besides the update feature you can test the buttons in both BT or Wired communication and you can check a list of all the currently support apps (apps that the remote can control)
Background Service:
The app uses a background service that takes care of monitoring which app is currently on the screen (to adjust control profile to it) and also takes care of wired communication.
App User Functionality
Test your remote controller and check the compatible apps.
Testing Buttons – In this section you can test buttons and choose the communication method for test (BT or Wired)
Compatible Apps – In this section you can check an always updated list of all the supported apps
No Keyboard when using a controller:
If the on-screen keyboard is missing when you click on text input boxes, chances are you paired a remote controller and the system disabled the on-screen keyboard.
This setting can be changed at anytime and the setting will be remembered by the system (you only need to do it once).
In the video:
- Pull the top notification drawer
- Click on the notification with “Configure physical keyboard” title
- Enable “Use on-screen keyboard”
- Done!
This setting can also be found in Android Settings > System > Languages & Input
Button Reference
Button names and reference functionality
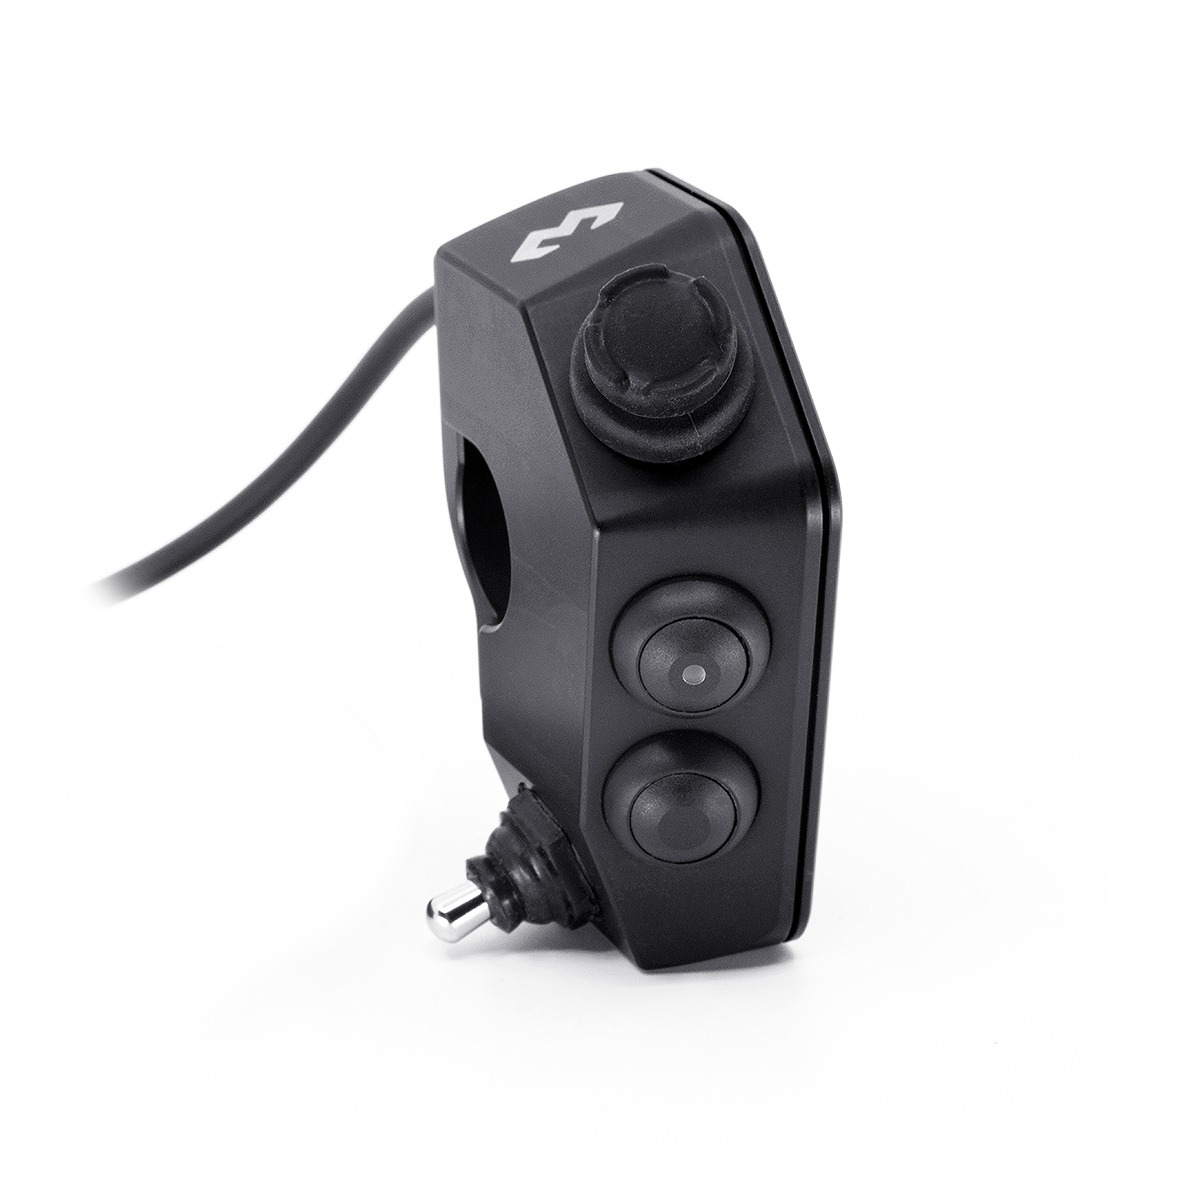
2 Way Switch ( Minus / Plus )
4 Way Joystick (Up, Down, Left, Right)
Button A (Function / Enter / Confirm)
Button B (Function / Back / Cancel)
For reference we usually call the remote buttons the following names:
- Top 4 Way Joystick – Usually Up / Left / Down / Right type of actions
- Bottom 2 Way Switch – Usually Plus / Minus or Zoom In / Zoom Out type of actions
- Button A – Enter / Select type of action
- Button B – Cancel / Alternative type of action
The functionality of each button greatly depends on the app you are using and what is on the screen. Some apps like DMD2 allow you to fully configure each button on some sections (example: Roadbook), for sections where you cannot configure you can use this reference:
- Button A click – is usually Enter or Select for any dialog box, in the map view it toggle the follow location if nothing else is in the screen
- Button A long press – will jump to the bottom menu to change the current view
- Button B click – is usually an alternate function, in the map view for example it toggle the satellite layer
- Button B long press – is usually CANCEL if any dialog is on the screen, if no dialog is preset it will do another function, in the map for example it will do LOCK
- Top 4 Way Joystick – will be selection cursor when there is anything selectable on the screen, for the map it will be map panning
- Bottom 2 way switch – will do Zoom In and Zoom Out or Increase / Decrease if such dialog type is on the screen
Note that Button A and B usually have long press functions (unless configured otherwise – for example in the roadbook view where you can configure every button). Both the 4 way joystick and 2 way switch will not have long press actions but instead do repeat (again, unless if configured otherwise).
App Support and Bug Report
If you want the controller to work with any other app that is currently not supported or if one of the supported apps is not working correctly please use the following form to let us know!
Request App Support
If you need the controller to control any app that does not show in the supported apps list
Report App Support Problem
If the controller functions are not working for any of the supported apps or if the functionality is not good
Supported Apps
The list of supported apps is always growing and we will soon release an update with more apps!
- DMD2
- OSMAnd+
- Trans Euro Trail
- Tom Tom GO Ride
- Most Launchers
- GPX Viewer Pro
- LOCUS Map 4
- Google Maps
- Gaia GPS
- GURU Maps
- Garmin Tread Map/Launcher
- Rally Moto UK
- OSMAnd
- Waze
- Kurviger in Follow Mode
- Terra Pirata Roadbooks
- GPX Viewer
- GPX Viewer Pro

